Easy Sock Gnomes: Free Crochet Pattern in 5 Simple Steps
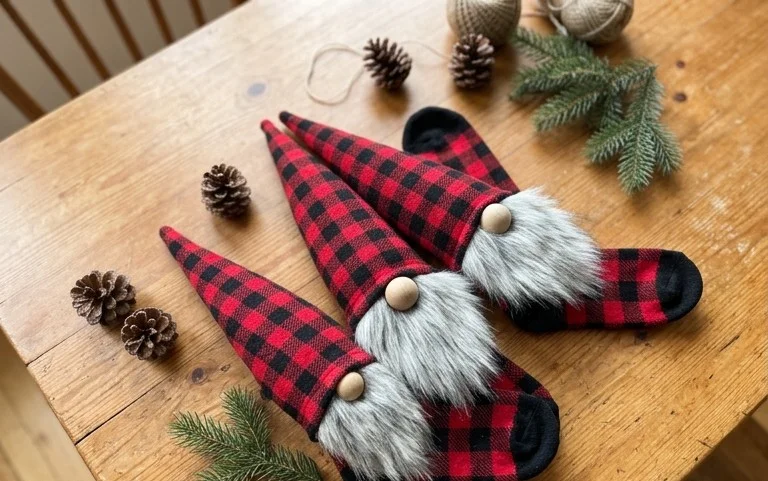
These rounded gnomes stand firmly on your shelf with a dense, squishy texture that makes them satisfying to hold during a long afternoon. Each gnome features a pointed hat and a hidden weighted base, which helps them stay upright on desks or narrow windowsills. If you are new to working with worsted weight cotton, this project builds your confidence by repeating basic single crochet stitches until the shape naturally rounds out. You will finish your first figure in less than an hour, gaining hands-on practice with the magic ring and count consistency that defines professional amigurumi work.
Why This Project Is Worth Making
This beginner-friendly project is a quick, rewarding make that helps you master the magic ring and consistent tension in the round. Because it uses only basic single crochet stitches, you can focus on perfecting your stitch uniformity rather than decoding complex stitch patterns. It is an ideal stash-buster for small amounts of leftover yarn, making it easy to create an entire set in a single evening. The resulting piece functions perfectly as a soft desk accessory or a tactile toy for children, offering a durable texture that holds its shape well over time.
I managed to finish three of these in one weekend using yarn from my scrap basket. The instructions are very clear, especially for the closing steps which I usually struggle with.
— Sarah, amigurumi enthusiast
Pattern Overview & Skill Level
- Skill Level: Beginner
- Approximate Time: 45 to 60 minutes
- Construction: Amigurumi style, worked in continuous rounds
- Finished Dimensions: Approximately 3 inches tall by 2.5 inches wide
Materials & Supplies Needed
- Yarn: Worsted weight (#4), 100% cotton yarn (approx. 20 yards). Cotton is preferred for its lack of pilling and clear stitch definition.
- Hook Size: 3.5 mm (E-4)
- Notions: Fiberfill stuffing, 6mm safety eyes, tapestry needle, stitch markers, and scissors.
- Yarn Substitutions: You may use acrylic yarn for a softer, more plush feel, though this may result in a slightly larger finished size due to the inherent stretch of acrylic fibers.
Stitch Guide & Abbreviations (US Terms)
- MR: Magic Ring
- ch: chain
- sc: single crochet
- inc: 2 sc in same st
- dec: sc2tog (insert hook in front loop of next two stitches, yarn over, pull through, yarn over, pull through all loops)
- sl st: slip stitch
- st(s): stitch(es)
Step-by-Step Pattern Instructions
Body
- Rnd 1: 6 sc in MR. (6 sts)
- Rnd 2: Inc in each st around. (12 sts)
- Rnd 3: (Sc 1, inc) repeat 6 times. (18 sts)
- Rnd 4: (Sc 2, inc) repeat 6 times. (24 sts)
- Rnd 5-9: Sc in each st around. (24 sts)
- Rnd 10: (Sc 2, dec) repeat 6 times. (18 sts)
- Insert safety eyes between Rnd 7 and Rnd 8, with 4 stitches of space between them. Begin adding fiberfill stuffing.
- Rnd 11: (Sc 1, dec) repeat 6 times. (12 sts)
- Rnd 12: Dec 6 times. (6 sts)
Assembly & Finishing
Cut the yarn leaving a 6-inch tail. Use the tapestry needle to weave the tail through the front loops of the remaining 6 stitches. Pull tight to close the opening securely. Knot the yarn and pull the tail back into the center of the piece to hide it.
Care & Washing Instructions
- Hand wash in cool water using a gentle, wool-safe detergent to maintain the structure of the stuffing.
- Lay flat on a clean towel in a shaded area to air dry completely.
- Gently knead and reshape the item after it dries to ensure the fiberfill returns to its original, rounded form.
Pro Tips & Common Mistakes to Avoid
To achieve a professional look, maintain a tight, consistent tension. If your stitches are too loose, the stuffing will show through the gaps. Always place a stitch marker at the first stitch of every round to avoid losing your place in the count, as continuous rounds lack clear join lines. When weaving in your ends, weave under the stitches on the interior of the piece rather than across the surface to keep the exterior smooth and clean. If you wish to make a larger version, you can increase the rounds by adding more increase rows, but keep in mind that this will require significantly more yarn and larger safety eyes to maintain the correct proportions.
Frequently Asked Questions
Can I use a larger hook size than suggested?
Using a larger hook will result in larger gaps between your stitches, which may cause the fiberfill to poke through. It is recommended to use a hook size smaller than the one recommended on the yarn label to keep the fabric dense.
Is this pattern suitable for complete beginners?
Yes, this pattern uses only standard single crochet stitches and basic increases and decreases. If you can master the magic ring and keep track of your stitch markers, you will find this project straightforward.
What is the best way to secure the fiberfill inside?
Add the stuffing gradually as you finish your decrease rows. Ensure the stuffing is firm but not so packed that it stretches the stitches apart, as this can distort the shape of the finished piece.
May I sell the items I make from this pattern?
You are welcome to sell finished items made from this pattern, provided you credit the designer. Always check the specific copyright terms associated with the pattern source before listing items in a shop.
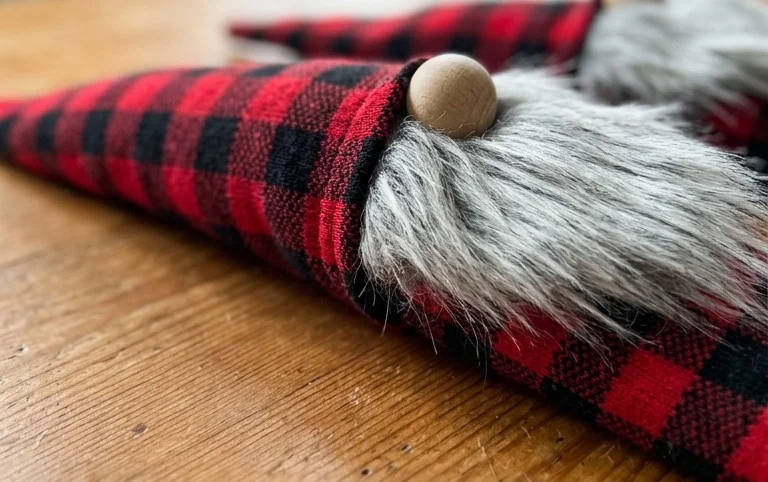
Your finished gnome now sits upright with a charming, handmade character that adds personality to any room in your home. Experiment with different yarn weights to change the scale of your gnomes or try adding a small faux fur beard for a bit of extra texture on the face. I enjoy seeing how each person puts their own spin on these basic figures, so feel free to share a photo of your work on your favorite social media platform. You can find more free patterns and seasonal projects in my archive to keep your needles busy.