Easy Christmas Bunting: Free Crochet Pattern for Beginners
These hanging crochet spheres create a lightweight and festive look for your holiday mantelpiece or tree. Each individual ornament works up in less than an hour, making this an ideal project for filling an empty afternoon while watching a movie. Beginners will find the process straightforward because it uses a single continuous spiral of basic single crochet stitches throughout the construction. The texture is dense enough to hold its shape when stuffed firmly with fiberfill, yet soft enough to handle easily while you work. You will learn to manage tension while working in a tight magic ring for a seamless finish.
Why You’ll Love This Pattern
This crochet sphere pattern uses a basic circular construction that serves as the foundation for countless amigurumi projects, from holiday ornaments to play food. Because it relies on simple single crochet stitches worked in a continuous spiral, you can complete a sphere in under an hour once you have the rhythm down. The process is meditative, requiring only one type of stitch and a small amount of yarn, which makes it ideal for cleaning out your stash of scrap yarn. You do not need to worry about complex joins or turning chains, as the work remains on the right side throughout the entire process.
I have used this base pattern for everything from pumpkins to snowmen because the shaping is perfectly round and very sturdy. It is the first pattern I recommend to anyone learning to work in the round.
— Sarah, amigurumi designer
Pattern Overview & Skill Level
- Skill Level: Beginner
- Approximate Time: 45–60 minutes
- Construction: Amigurumi-style continuous rounds starting from a magic ring
- Finished Dimensions: Approximately 3 inches in diameter when using worsted weight yarn
Materials & Supplies Needed
- Yarn: Worsted weight (#4) acrylic or cotton blend, approximately 30 yards.
- Hook Size: 4.0 mm (G-6) crochet hook.
- Notions: Tapestry needle for weaving ends, fiberfill stuffing, stitch marker.
- Safe yarn substitutions: You may use DK weight yarn with a 3.5 mm hook for a smaller sphere, or bulky weight yarn with a 5.5 mm hook for a larger version. Changing weight will impact the final size and the density of the stitches, so ensure your hook is small enough to prevent stuffing from showing through the gaps.
Stitch Guide & Abbreviations (US Terms)
- MR: Magic ring
- ch: Chain
- sc: Single crochet
- inc: Increase (work 2 sc in the same stitch)
- dec: Invisible decrease (insert hook into front loops of the next 2 stitches, yarn over, pull through, yarn over, pull through all loops on hook)
- st(s): Stitch(es)
- sl st: Slip stitch
Step-by-Step Pattern Instructions
Sphere Body
- Rnd 1: 6 sc in MR (6 sts)
- Rnd 2: inc in each st around (12 sts)
- Rnd 3: [1 sc, inc] repeat 6 times (18 sts)
- Rnd 4: [2 sc, inc] repeat 6 times (24 sts)
- Rnd 5: [3 sc, inc] repeat 6 times (30 sts)
- Rnd 6-10: sc in each st around (30 sts)
- Rnd 11: [3 sc, dec] repeat 6 times (24 sts)
- Rnd 12: [2 sc, dec] repeat 6 times (18 sts)
Finishing and Assembly
At this point, begin adding fiberfill stuffing. Fill the sphere firmly but ensure the fabric does not stretch to the point where the stuffing is visible. Continue the final decrease rounds once the shape is supported.
- Rnd 13: [1 sc, dec] repeat 6 times (12 sts)
- Rnd 14: [dec] repeat 6 times (6 sts)
Cut the yarn leaving a 6-inch tail. Use the tapestry needle to weave the yarn through the front loops of the remaining 6 stitches. Pull the tail tightly to close the opening completely. Secure the end by pushing the needle through the center of the sphere and trimming the excess yarn close to the surface.
Care & Washing Instructions
- Hand wash in cool water using a gentle soap or detergent.
- Do not wring the sphere; gently press between two towels to remove excess water.
- Air dry on a flat surface, reshaping the sphere while damp to maintain its round form.
Pro Tips & Common Mistakes to Avoid
Maintain consistent tension by holding your yarn with a steady grip, as loose tension allows stuffing to poke through the gaps between stitches. Always place a stitch marker in the first stitch of every round; since this pattern is worked in a continuous spiral, it is easy to lose track of where one round ends and the next begins. To hide your yarn ends, pull them inside the sphere using your crochet hook before closing the final hole. If you wish to make the sphere larger, simply continue increasing by 6 stitches every round until you reach your desired diameter, then work even for several rounds before beginning the decrease sequence.
Frequently Asked Questions
Can I use a different type of yarn?
Yes, you can use any yarn weight as long as you pair it with a hook size smaller than what is recommended on the yarn label. This creates a tight fabric that keeps the stuffing inside.
Is this project suitable for a complete beginner?
This pattern is an excellent choice for beginners because it focuses on a single stitch type and follows a predictable mathematical progression that helps you understand how 3D shapes are formed.
How do I make the sphere perfectly round?
The key is firm stuffing. After closing the sphere, roll it gently between your palms to distribute the fiberfill evenly, which helps correct any flattened sides.
Are the finished items safe for children?
If you intend to give this to a small child, ensure all ends are securely woven in. Avoid adding small attachments like buttons or plastic eyes, as these can pose a choking hazard.
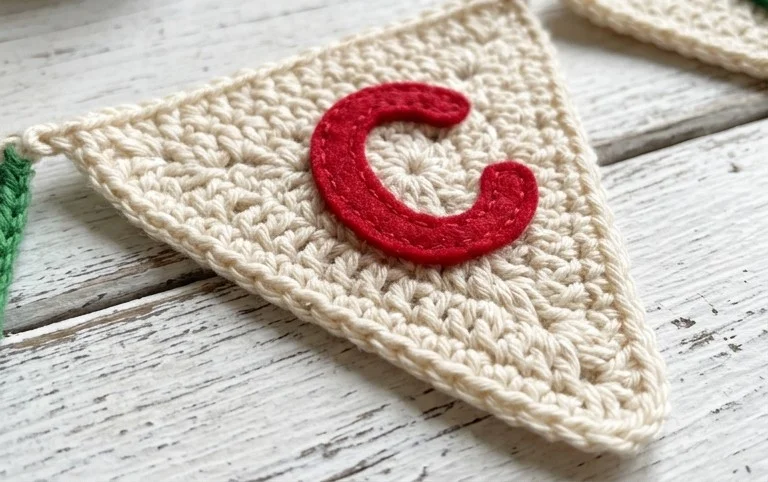
Your finished set of holiday spheres adds a handmade charm to your home that store-bought decorations often lack. You can customize the look by using metallic thread held alongside your main yarn for an extra shimmer or by alternating colors on every second ornament to create a rhythmic pattern. Posting a photo of your garland on social media helps others find this design for their own homes. Please browse through the rest of the blog archives for more free patterns that utilize these same basic crochet skills.